Well, today I'm moving in all my crafts that I have spent making this summer. I'm excited to share my latest Monday Made-its with you and I'm excited to get them in the classroom.
This might be my FAVORITE! I was telling my friend how I would LOVE to find an old desk to use as a child's teacher helper desk OR star student desk. She said "I have one that you can have." WHA?! I couldn't wait to get it home and bust out the spray paint.
Because of the different areas and different colors, I had to use a lot of tape and it had to be done in phases.
AfterI Josh sprayed painted the desk I needed to find the right font for the chalkboard top.
I decided to use SK Cinderella and printed it off as large as I could one sheet of paper. I colored the back with chalk, taped it to the front of the desk, and traced the letters with a pencil. When the paper was pulled off it left a chalk outline that I then painted in with a permanent chalk pen.
My plan is to put a basket of stickers, stamps, fun pens, and pencils at the bottom of the desk.(more pics later) This desk will be reserved each week for a student that has worked hard and will be my teacher helper for the week. This student will be the line leader, classroom helper, and they will have the chance to share something that they are an expert in with the class - which will go well with our Genius Hour. ;-)
I Josh made crate seats for my reading table. I already had the crates I just needed to purchase:
Finally, I put together some of my wall headers using paper papers and SK Sew Board font.
The sad and sweet thing is, my wrist still hurts from my bicycle wreck so Josh actually did a lot of my crafts for me. He's so wonderful and CrAfTy--I'm so thankful for him.
I've gotta go so I can get in my classroom.
This might be my FAVORITE! I was telling my friend how I would LOVE to find an old desk to use as a child's teacher helper desk OR star student desk. She said "I have one that you can have." WHA?! I couldn't wait to get it home and bust out the spray paint.
Because of the different areas and different colors, I had to use a lot of tape and it had to be done in phases.
After
I decided to use SK Cinderella and printed it off as large as I could one sheet of paper. I colored the back with chalk, taped it to the front of the desk, and traced the letters with a pencil. When the paper was pulled off it left a chalk outline that I then painted in with a permanent chalk pen.
We now have a SCHOLAR SEAT!
My plan is to put a basket of stickers, stamps, fun pens, and pencils at the bottom of the desk.(more pics later) This desk will be reserved each week for a student that has worked hard and will be my teacher helper for the week. This student will be the line leader, classroom helper, and they will have the chance to share something that they are an expert in with the class - which will go well with our Genius Hour. ;-)
1 yard of material (1 yard covers 4 seats)
sheet of plywood
foam cushions (4 cushions for $4 at Wal-mart)
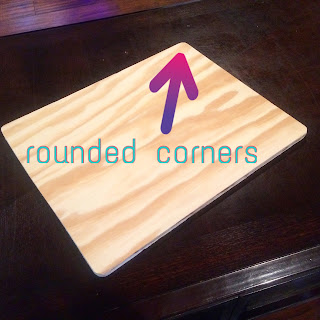
My crates were rounded on the inside which required a little more sanding than if they were not. That seemed to be okay with Josh...
Look at those corners. BEA.U.TI.FUL!
I did cut everything (so I kind of helped)...it was just almost impossible to use the staple gun with my left hand.-It was actually dangerous for the entire family.
I LOVE how they turned out just don't look too long at the cushions because your eyes will go wacky with all the polka dots. I can't wait to see them in the room.
The sad and sweet thing is, my wrist still hurts from my bicycle wreck so Josh actually did a lot of my crafts for me. He's so wonderful and CrAfTy--I'm so thankful for him.
I've gotta go so I can get in my classroom.


Comments
Post a Comment